# Device Enrollment
In this tutorial, you will learn how to enroll a device in a multi-tenant system. In order for communication to occur between the Ability Platform and your device, it must be properly enrolled. Typically, this would occur as part of the set up process for the device.
We will be taking a look at how device IDs are generated, what permissions are required in order to enroll a device, and the process in which you register a new device.
There are two paths that may be taken in order to register a device, a programmatic approach utilizing APIs and a UI based approach utilizing the Admin Portal application. Both of these processes are outlined within this document.
# Prerequisites
This tutorial contains two paths, and assumes the following:
- You know the Identity Provider that a device will use to authenticate.
- Appropriate access levels and permissions are already in place:
- For the Admin Portal registration path, the registrar must have at least
Solution Administratorpermissions - For the API registration path, the registrar has an
access_tokenfor accessingPrincipal ManagerAPI endpoints
- For the Admin Portal registration path, the registrar must have at least
# Obtaining a Unique Device ID
In order to register a new device, it must be assigned a unique device ID. This ensures proper operation within the system, and pre-emptively prevents collisions that may occur.
# Edge Modules
Device IDs for Edge Modules are provided as part of the abb-iot-edge-setup
script that will be run during the initialization of the associated module.
Detailed information can be found in the Edge Provisioning With
Multi-tenancy
section.
# Directly Connected Devices
Device IDs for Directly Connected Devices may be retrieved using the Global ID Generator.
The Global ID Generator provides functionality for generating new GUIDs, and
verifying that they will not encounter any collision. This functionality is
provided as a POST endpoint at /api/ids. For information on how to create an
ID, please see the Generating
IDs section of
the Global ID Generator documentation.
# Admin Portal Registration Path
The following sections contain information on how to register a device using the Admin Portal.
# Registering a Device
Once an ID has been generated, it must be registered to the appropriate
tenant and solution. In order to register a device, you are required to
have Solution Administrator level privileges for your BL solution. Failure to
have these permissions in place will result in you being unable to access some
or all of the proceeding steps.
Log in to the Admin Portal targeting the tenant in which the device should be registered.

Once logged in, navigate to your solution:
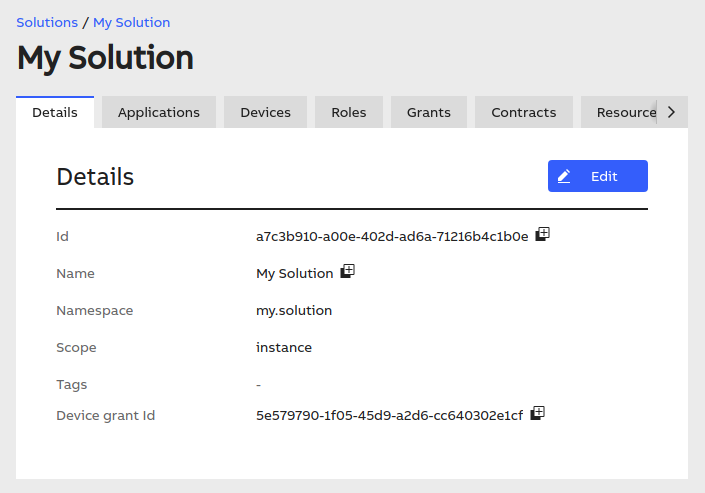
Navigate to the
Devicestab of the solution that the device will be registered to.
Click the
New Devicebutton to begin registering a new device.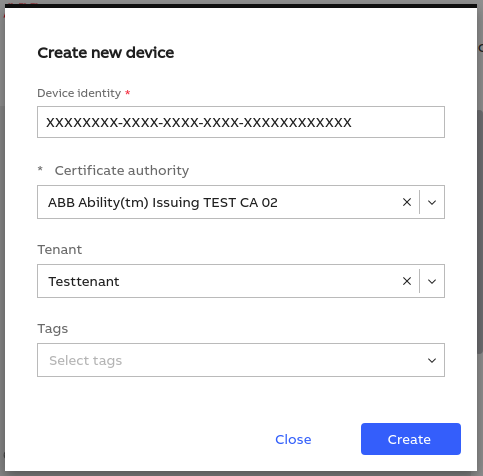
Enter the device ID that was generated previously in the
Deviceinput.Select the the appropriate tenant for the device from the
Tenantdropdown list.Select any necessary tags to associate with the device. These values are optional.
Select the appropriate Identity Provider for your device from the
Identity Providerdropdown list.Once all information has been entered, click the
Savebutton.
Upon completing these steps, your device has been properly registered. At this
point, you may start the device and view the status of the connection within the
Admin Portal. Properly functioning and connected devices will display the
Connected status.
# API Registration Path
The Admin Portal is built on top of Principal Manager API. In some end user implementations, direct use of the API may be more efficient than using the Admin Portal. The following sections contain information on how to register a device using API endpoints.
# Registering a Device
A number of API endpoints are provided to facilitate development of a management portal by a Business Line, or to allow device registration to occur programmatically. The following steps should be taken in order to register a device through API calls.
Access Tokens
The following steps assume that you are using a valid access token for authorization. Generating this token will vary based on the Identity Provider that is being used for your solution.
Issue a
POSTcall to the/devicesendpoint of your environment. The request must be issued with the following format. Theidentity,identityProviderId,tenantId, andsolutionIdfields are required in order to fully provision and enroll a device. ThetagsandparentIdfields are optional. The values in the following call are provided as an example only, and should be replaced with values corresponding to your environment.curl -X POST \ 'https://api-xxxxx.abilityplatform.abb/devices' \ -H 'Authorization: Bearer {access_token}' \ -H 'Content-Type: application/json' \ -d '{ "identity": "string representing an Identity Provider or parent", "identityProviderId": "string representing an Identity Provider ID", "tenantId": "string representing the Tenant to register the device to", "solutionId": "string representing the Solution the device will belong to", "parentId": "For principals without an external identity - an identifier of a parent that will be used to authenticate this principal", "tags": [ "string representing a tag value", "string also representing a tag value" ] }For more information on the
/devicesAPI call, see the endpoint documentation.Upon successful registration, a
201response code will be returned. Additionally, anidfield will be returned indicating the device ID that has been assigned to the newly created device. For any other codes that may be returned, please see the documentation on error codes.
After completing these steps and receiving a 201 response from the API
Endpoint, your device has been properly registered. In order to verify this, you
may issue a GET call to the /devices/{deviceId}, where deviceId is the
GUID of the device.
curl -X GET \
   `https://api-xxxxx.abilityplatform.abb/devices/{deviceId}` \
   -H 'Authorization: Bearer {access_token}'
If the device is found, you will receive a 200 response from the endpoint. For
information on other error codes, see the documentation on error codes.