# Factory Proxy Onboarding
Factory proxy onboarding using Certificate Manager API / Admin Portal is a prerequisite for any factory proxy operation.
Onboarding procedure is required to:
- secure the Factory Proxy - Certificate Manager communication
- restrict the Factory Proxy usage scope to a selected PKI profile
For proxy onboarding you need to have:
- your application registered in Azure Active Directory (AAD)
- access to the Certificate Manager Portal as a Production Admin
# Azure Active Directory registration
Factory proxy is represented in Azure AD as an application. This application should be registered and authorized to communicate with the Certificate Manager Service.
Follow the instructions below to register your application:
Go to the Azure Portal.

Select App registration from the sidebar.
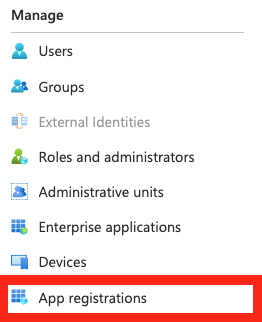
Select New registration.

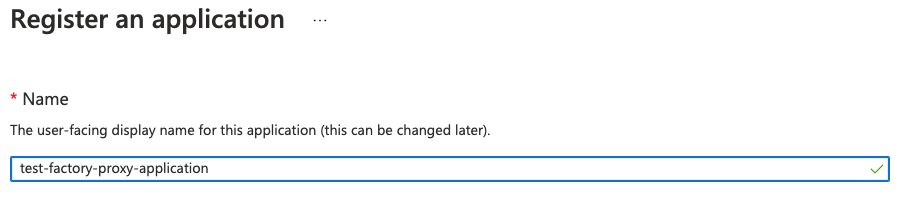
Provide the Name of your application and select Register.
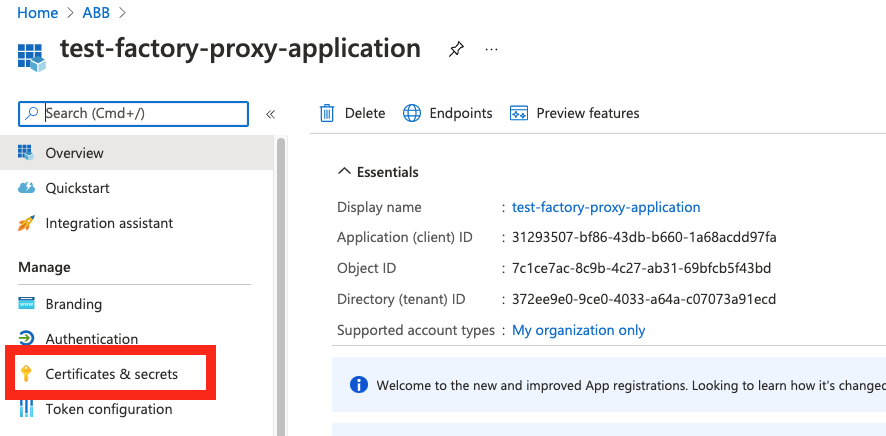
Note down your Application (client) ID shown in the details section.
Select Certificate & secrets from the sidebar.
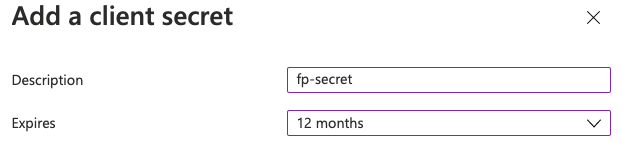
Select New client secret.

Set the description and expiration period of the secret and select Add.
Your application is now registered in AAD, and your Application secret is presented here:

Store it securely as it will be required later on by your application.
# Onboarding
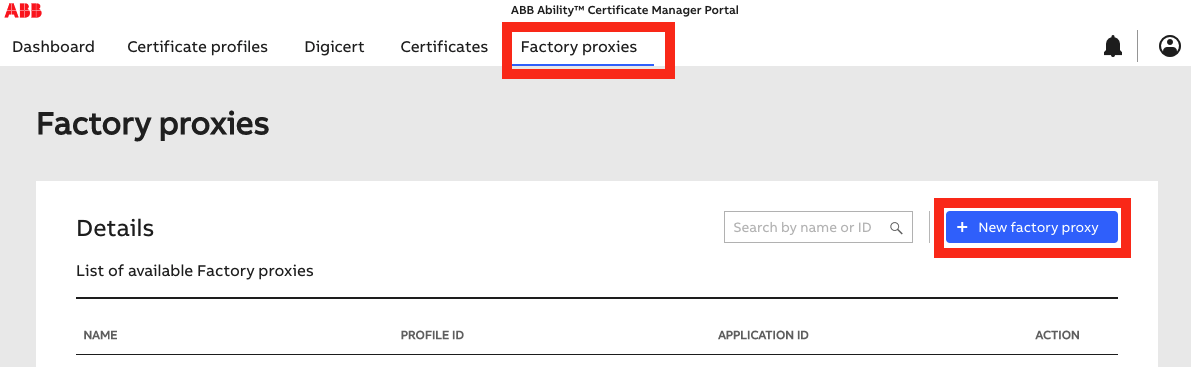
Open Certificate Manager Portal and Sign in.
Navigate to the Factory proxies tab and select New factory proxy.
Provide the following details:
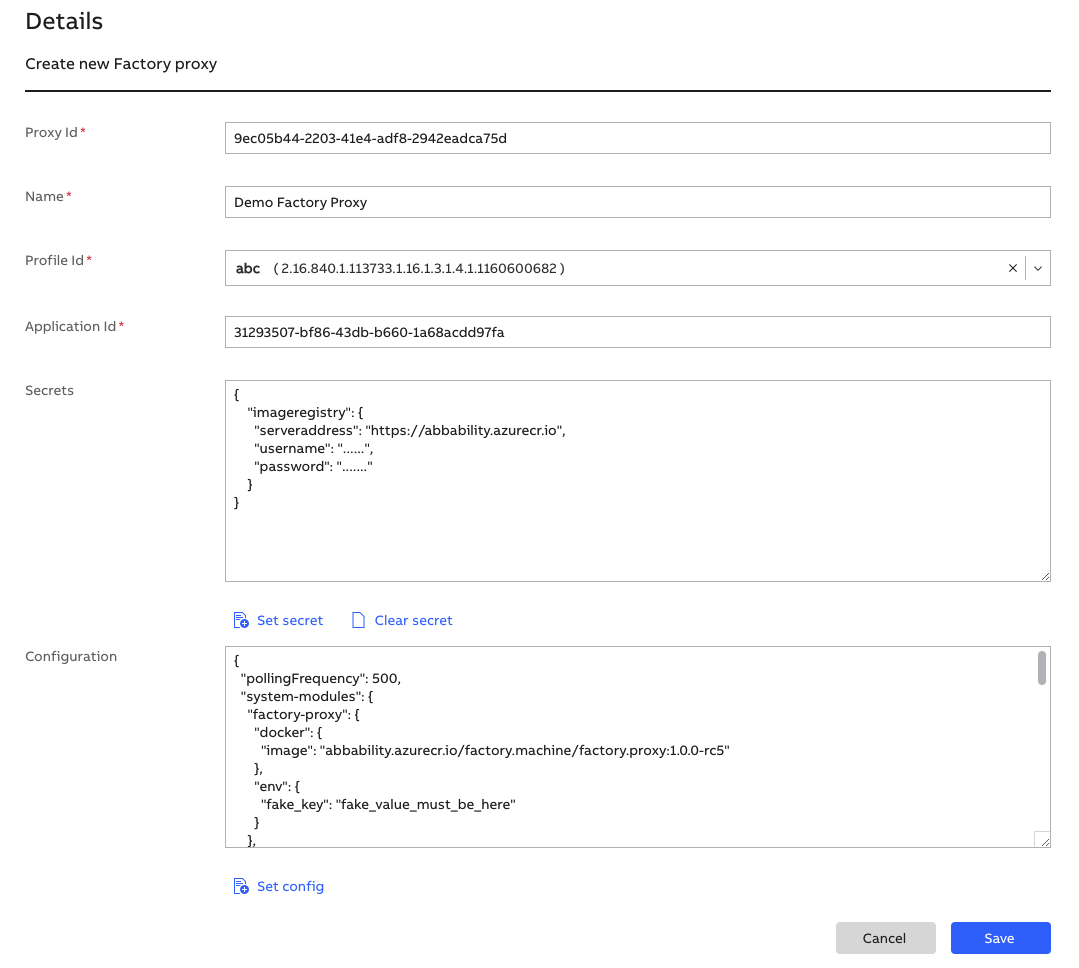
Proxy Id (required)
Enter a GUID (UUID in version 2) that will identify your factory proxy. You could use the standard Linux tool uuidgen to generate that.
Name (required)
Enter a string with your proxy name.
Profile Id (required)
Select a PKI Profile the proxy will use for enrollments and certificate activities. You can only select the profile you are set as Production Admin.
Application Id (required)
Enter an Application (client) ID - a GUID identifying your Application in Azure AD. See the Registration section above for more details.
Secrets (optional)
It is a JSON that contains the secrets your factory proxy will need to communicate with external systems. One of such systems is the private Docker Registry that the proxy will pull images from. You should provide a username and password for the private registry.
Input the details using the following template:
{
    "imageregistry": {
        "serveraddress": "https://abbability.azurecr.io",
        "username": "<USERNAME>",
        "password": "<PASSWORD>"
    }
}
To get the values for
<USERNAME>and<PASSWORD>, contact your Client Success Team representative.Reference Architecture
The format and contents specified above apply to the reference Factory Proxy architecture (implementation of which you're installing right now). If you are about to use your own architecture and implementation, it is up to you what this field contains.
Editing the secret value
The secret value is disabled by default when editing the proxy. To overwrite it, enable the secrets field by clicking the padlock icon. To clear the secret, send an empty JSON object. Selecting Clear secret will input an empty JSON object into the Secret field.
Configuration (optional)
Enter a JSON text with your desired Factory Proxy configuration. At the start, the factory-proxy module will read that JSON object to apply this configuration.
The schema of the configuration may be found here.
A basic example:
{
    "pollingFrequency": 500,
    "system-modules": {
        "factory-proxy": {
            "docker": {
                "image": "abbability.azurecr.io/factory.machine/factory.proxy:1.0.1"
            }
        },
        "factory-broker": {
            "docker": {
                "image": "abbability.azurecr.io/factory.machine/factory.broker:1.0.0"
            },
            "env": {
                "persistence": true,
                "maxMessageSize": 1024,
                "maxStorageSize": 1024,
                "maxMessages": 100,
                "logDestination": "stdout",
                "sessionTimeout": 10
            }
        }
    },
    "modules": {
        "my-module": {
            "docker": {
                "image": "abbability.azurecr.io/factory.machine/referencemodule:1.0.0",
            }
        }
    }
}
Reference Architecture
The format and contents specified above apply to the reference Factory Proxy architecture (implementation of which you're installing right now). If you are about to use your own architecture and implementation, it is up to you what this field contains.
Select Save to add your proxy. You can go back to the page any time you want to change the configuration in the future.