# Edge SDK VM Configuration
The Edge requires information from the ABB Ability™ Platform instance to function. The sections below identify the information required to configure an Edge.
# Prerequisites
The following are required to extract the information from the Platform.
- ABB Ability™ Platform instance identification information. Instances can be requested using this process (also Ability Sandbox may be used).
- During the request process, an Ability Solution will be created and your ABB Active Directory user will have access to the solution. This access will allow the Edge to be provisioned.
# Extract Information
The ABB Ability™ SDK VM requires the following information to be configured and run:
- An Edge type must be defined and created in the Platform. If the Platform does not have types available, the types for the Example Modules can be loaded.
- DPS Scope ID for the provided instance: The DPS Scope ID is a global identifier that allows the device provisioning and certificate management service (DPCM), running on your Edge device, to locate the instance of Device Provisioning Service and connect to the Platform instance. DPS Scope ID is provided with your instance.
- Global ID Generator: This is provided with your instance
- Ability PKI Dev profile must be pre-configured in the provided environment already. If it is not installed, use the following procedure.
- A valid user with permissions to add Type Defintion is required. This will also be setup during the request instance process.
# Overview
In order to be able to send telemetry, and/or get your ABB Ability™ Edge SDK VM configured with your modules, your virtual machine needs to connect to the ABB Ability™ Platform. There are multiple instances of the ABB Ability™ Platform deployed in various regions for different clients, so you need to make sure to point your VM to the correct one for your needs. The following procedure is specific to the ABB Ability™ Edge SDK VM. Please also familiarize yourself with the process for installing a prebuilt Edge VM Image.
From the previous steps, the following should be verified as available:
- Access to an ABB Ability™ Platform Admin Portal
- The Global ID Generator URL, the DPS Scope ID, and confirmation that the Ability PKI CA certificate is configured correctly in the provided ABB Ability™ Platform instance.
- The ABB Ability™ Edge SDK VM. Verify that this VM has been Imported into the hypervisor software of your choice.
Before you begin, you should have a clean ABB Ability™ Edge SDK VM installed and started. If you haven't done so yet, please follow the ABB Ability™ Edge SDK Virtual Machine tutorial.
One Time Use
The official ABB Ability™ Edge Setup tool is non-reentrant. This means that you can run it only once on every VM. In order to change the parameters of your ABB Ability™ Edge device, you have to create a new VM. If the hypervisor selected supports snapshots/checkpoints, after the import take a snapshot/checkpoint before the VM is started for the first time.
# Steps to Configure an Edge
Below is the list of activities that are required to configure an Ability Edge. Each of these steps will be covered further in this article.
- Prepare your platform by uploading all the type definitions necessary to run the Edge.
- Boot the Edge and assign a password.
- Edit
/etc/dpcm.configand confirm the correct CA and set IDServiceURL variable. - Edit
/var/ability/config/edge.envto update the EDGEPROXYIMAGE, DPS_SCOPE_ID, DEVICE_ID, and EDGE_TYPE variables. - Run
sudo abb-iot-edge-setup. This process will display adevice IDthat will be used in the next step to register this device with an Ablity Solution. - Use the Admin Portal to register the device ID.
- Run
sudo systemctl enable --now abb-iot-edgeto start the Edge software. - Run
journalctl -u abb-iot-edge.service -f -n 20to monitor the edge-proxy download and start of the proxy container. - Verify edge-proxy is running by issuing
docker service ls.
# Load the Edge Type into a Platform Instance
Before you can run an Edge, an Edge type must be loaded. Several Edge examples are available but custom types can be loaded if available. To simplify this effort, the following example types are available and can be used if a customer type is not available.
- C# Tutorials
- Edge Reference Module
- Load Custom Type
Once the EDGE_TYPE is defined in the ABB Ability™ Platform instance, the Edge can be configured and started.
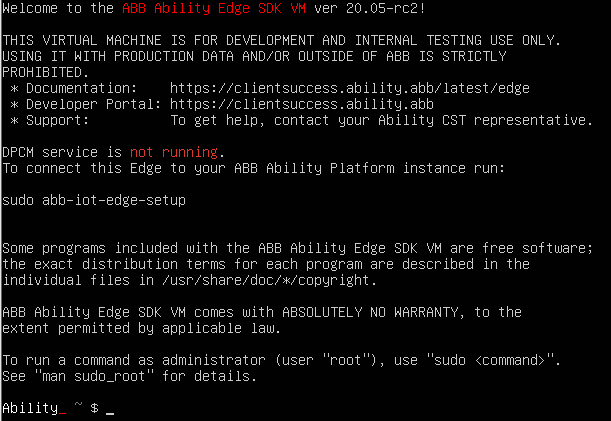
# First Login to the Ability Edge SDK VM
Your virtual machine comes with the default username ability and no default password. In order to be able to log in to the VM remotely, you first need to set a password for the user using the machine's console. Following the steps below should allow you to do this on an Oracle VirtualBox VM.
Open your virtual machine's console and start the ABB Ability™ Edge SDK VM. The exact steps depend on the program you use for virtualization.
Log in with the username ability (lower case).
Set your password when prompted. Linux passwords are case-sensitive and will not be printed on the console. You will have to type your new password twice to avoid any typos. Confirm each input with the Enter key on your keyboard.

After successfully setting your password, you should be greeted with a default ABB Ability™ Edge SDK VM prompt.
Execute the
ip acommand to determine the local IP address of the Virtual machine.
Record the IP address of the virtual machine. Your machine is now ready to be connected to the ABB Ability™ Platform instance and remote logins (optional).
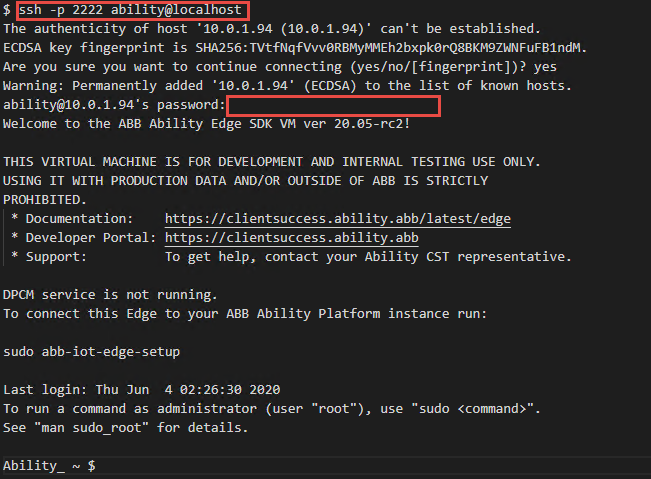
# Using SSH, Putty, or Another Third Party Client to Connect to the VM
Using a VirtualBox virtual console to operate your ABB Ability™ Edge SDK VM may be inconvenient, particularly since it is not possible to use your clipboard or to resize the console. For this reason, you may want to use a Secure Shell (SSH) to connect to the remote console of your VM from your development machine to benefit from all the integration features such as clipboard integration.
Connecting to the SSH Server
The ABB Ability™ Edge SDK VM uses a virtual
NAT network by default so it's impossible to connect to its SSH server directly.
To make it easy for you to use the remote SSH console, the default OVA image
automatically redirects the SSH port of your VM (22/tcp) to the loopback
interface (127.0.0.1 or localhost) of its host on port 2222/tcp.
# Using the SSH Command Line Client (Linux, Mac, Windows)
Tip for Windows Users
Windows users may need to install the OpenSSH command line client by installing the Git for Windows package and using Git bash for their terminal emulator.
Open your default console emulator/terminal and type:
$ ssh -p 2222 ability@localhostto connect as an ability user to the host localhost on port 2222 (see tip above to learn why).
If you're connecting to this VM for the first time, it will prompt you to confirm the VM's SSH host key. Type yes to confirm.
When prompted, enter your password set in the previous step. The password will not be printed to the console.
You should be greeted with a default ABB Ability™ Edge SDK VM prompt. You're connected!
# Connecting to the Platform
# Before You Begin
- If working within the ABB corporate network, make sure to configure your VM to use a proxy server.
# Overview of the Process
Your ABB Ability™ Edge device needs to be provisioned with a correct ABB Ability™ Platform instance. It needs to know which Device Provisioning Service (DPS) instance it should talk to in order to be connected with the correct IoT Hub.
On the ABB Ability™ Edge device, a DPCM (Device Provisioning and Configuration Module) takes care of the provisioning process that involves:
- Creating a unique device ID - DPCM generates a random UUIDv4 value to be used as its global, unique identity across all the ABB Ability™ Platform instances. It also verifies the value is not taken (by any other ABB Ability™ device) using the Global ID Generator REST service.
- Obtaining the identity certificate (X.509) - DPCM talks to the configured
Certificate Authority (CA) SCEP endpoint to obtain and authenticate the CA's
certificate and enroll the device to the CA. After this step, your ABB
Ability™ Edge gets its own X.509 certificate with its device ID set as a
Common Name in the certificate's Distinguished Name (Subject) field. ABB
Ability™ devices use this certificate to authenticate with DPS and the IoT
Hub. As an outcome of this step, you'll see a Certificate Signing Request,
private key, and device certificate PEM files in a location specified in
/etc/dpcm.config. - Enrolling to the DPS - DPCM uses the Device Provisioning Service of your
ABB Ability™ Platform to have a correct IoT Hub assigned after authenticating
to the service. As an outcome of this step, there will be a new device record
added to the respective IoT Hub's device registry and your
/var/ability/config/edge.envwill be changed to include this device's ID and IoT Hub hostname. - Starting edge-proxy - After all the steps above are completed, DPCM starts the edge-proxy - ABB Ability™ Edge orchestration and communication component to take over the management of your device.
# Set IDServiceURL
Use your favorite text editor (e.g., Nano) to open the Edge configuration file (
/etc/dpcm.config).$ sudo nano /etc/dpcm.configFind a line that starts with IDServiceURL and put in the correct GIG server URL.
Save the file. In Nano, you need to press CTRL + X and confirm with the Enter key.
# Set EDGE_TYPE, DPS_SCOPE_ID, DEVICE_ID, and EDGEPROXYIMAGE
Use your favorite text editor (e.g., Nano) to open the Edge configuration file (
/var/ability/config/edge.env).$ sudo nano /var/ability/config/edge.envFind a line that starts with EDGE_TYPE and put your desired Edge device's type definition after the "=" sign.
...
# Information model type definition. Must be already registered in the corresponding type registry
EDGE_TYPE=abb.ability.device.edge.sample@2
...
Find a line that starts with DPS_SCOPE_ID and put a correct scope ID after the "=" sign.
# This is an example value only
DPS_SCOPE_ID= 0neXXXXXXX
Find a line that starts with DEVICE_ID and put the device ID after the equals sign. Use
uuidgenfrom the command line to generate a unigue guid.# This is an example value only DEVICE_ID=<guid>Find the line that starts with EDGEPROXYIMAGE. Update the value to use the latest version supported for your version of the Ability Platform.
...
 # Docker related settings
 EDGEPROXYIMAGE=abbability.azurecr.io/edge/proxy:2.4.10
...
TIP
EDGEMQTTIMAGE is no longer used and the line can be deleted.
Save the file. In Nano, you need to press CTRL + X and confirm with the Enter key.
# Run the Installer
Run the official ABB Ability™ Edge framework installer script to finish the installation process.
$ sudo abb-iot-edge-setupWait for the script to finish. Observe the output on your console to make sure there were no critical errors during the execution. As part of the execution, a device ID should be generated and output to the console.
Use the generated device ID to register the device with the appropriate tenant.
After registering the device, finish the installation of the Edge by running the following command.
$ sudo systemctl enable --now abb-iot-edgeCheck the logs of the
abb-iot-edgeservice to make sure the provisioning process is finished.# To see all previous logs of the abb-iot-edge service $ journalctl --unit abb-iot-edge.service # To get a live view of new logs and 20 historical lines $ journalctl --unit abb-iot-edge.service --follow -n 20 # You can return to your shell by pressing CTRL+CAfter the Edge finishes the provisioning process, it will start the edge-proxy docker container. Verify it's started correctly by issuing:
$ docker service lsMake sure a line for the
edge-proxystates 1/1 replicas running.
# Next Steps
If you selected one of the provided example modules, your ABB Ability™ Edge is running one or all of the examples. Navigate here to learn what the tutorial module or modules are doing. It is also possible to modify the examples, build a new container, and deploy the updated container to this Edge or another Edge. See creating a custom module.