# Object Model Endpoints
It is time to get back to our SPA. In this part of the tutorial we will:
- extend the SPA with the functionality of GETting object models
- extend the SPA with the functionality of PATCHing object models
Make sure that your Edge module is still running, since the second point of the list above will be reflected in the runtime of the module.
# Object Model Service
First, we will add a new service that will be responsible for handling object model related requests. If you stopped our web application, let's get it back into running state by invoking the following, well-known to you, command (in the directory of the app):
npm run serve
Open the code editor and add a new file
src/objectModels/objectModelService.js (a new directory objectModels is
needed):
import axios from 'axios';

async function getObjectModel(accessToken, objectId, modelDefinition) {
  const url = new URL(
    `v1/objects/${objectId}/models/${modelDefinition}`,
    process.env.VUE_APP_INSTANCE_API_URL
  )

  try {
    const response = await axios({
      method: "get",
      url: url.toString(),
      responseType: "json",
      headers: { Authorization: `Bearer ${accessToken}` },
    })

    return response.data
  }
  catch (error) {
    console.log(error.response)
    throw (error)
  }

}

async function patchObjectModel(accessToken, objectId, modelDefinition, updateBody) {
  const url = new URL(
    `v1/objects/${objectId}/models/${modelDefinition}`,
    process.env.VUE_APP_INSTANCE_API_URL
  )

  try {
    const response = await axios({
      method: "patch",
      url: url.toString(),
      responseType: "json",
      headers: { Authorization: `Bearer ${accessToken}`, "Content-Type": "application/json" },
      data: updateBody
    })
    return response.data
  } catch (error) {
    console.log(error.response)
    throw (error)
  }
}

export { getObjectModel, patchObjectModel }
Both functions are rather simple. Just like before, we're making use of axios to simplify the HTTP request operations.
# Reading Object Models
Since we have a function getObjectModel defined, we can use it in our app. Let's create a new
Vue.js component src/objectModels/ObjectModelGet.vue:
<template>
  <div class="card" style="height: 100%">
    <div class="card-body">
      <h5 class="card-title">3. Object Model Retrieval</h5>
      <h6 class="card-subtitle mb-4 text-muted">You can get the
      object models that were created by the Ability Edge framework</h6>
      <div class="container">
        <div class="row">
          <form @submit.prevent class="col">

            <div class="form-group">
              <label for="objectIdInput">ObjectId</label>
              <input
                v-model="objectId"
                type="text"
                class="form-control"
                id="objectIdInput"
                placeholder="00000000-0000-0000-0000-000000000000" />
              <small class="form-text text-muted">The objectId of the
              object that you want to retrieve.</small>
            </div>

            <div class="form-group">
              <label for="modelDefinitionInput1">Model Definition</label>
              <input
                v-model="modelDefinition"
                type="text"
                class="form-control"
                id="modelDefinitionInput1"
              />
              <small class="form-text text-muted">The model definition of the object.</small>
            </div>

            <button
              type="button"
              @click="getObject"
              class="btn btn-primary mb-3"
              :disabled="!objectId || !modelDefinition"
            >GET</button>
          </form>
        </div>

        <div class="row">
          <div class="col">
            <label for="objectGetTextArea">Response</label>
            <textarea id="objectGetTextArea" readonly
            v-model="result" class="form-control" rows="9"></textarea>
          </div>
        </div>
      </div>
    </div>
  </div>
</template>

<script>
import AuthService from "../auth/AuthService";
import { getObjectModel } from './objectModelService'

export default {
  name: "ObjectModelGet",
  data: function () {
    return {
      authService: null,
      objectId: null,
      modelDefinition: "abb.ability.device",
      result: null
    };
  },
  methods: {
    async getObject() {
      try {
        this.result = null

        if (!this.authService.isAuthenticated()) {
          await this.authService.signIn();
        }
        const { accessToken } = await this.authService.getToken();

        const data = await getObjectModel(accessToken, this.objectId, this.modelDefinition);
        this.result = JSON.stringify(data, null, 2);
      }
      catch (error) {
        console.log(error)
        this.result = error;
      }

    },
  },
  created: function () {
    this.authService = AuthService.getInstance();
  },
};
</script>
If you followed the previous parts of the tutorial, there shouldn't be any surprises for you. The APi requires the model definition and objectId to be provided. We have the inputs for these. In the JavaScript portion we retrieve an access token and invoke our service that we just created.
Let's now update src/App.vue in order to display the new component:
<template>
  <div class="app">
    <header class="mb-4">
      <nav class="navbar navbar-light bg-white border-bottom">
        <div class="container">
            <span class="navbar-brand mb-0 h1 text-wrap">
            Getting Started with <span class="abb font-weight-bold">ABB Ability™ Platform
            </span></span>
        </div>
      </nav>
    </header>

    <main class="container">
      <div class="row">
        <div class="col-12 mb-4"><AccessToken /></div>
        <div class="col-lg-6 mb-4"><TypeDefinition /></div>
        <div class="col-lg-6 mb-4"><ObjectModelGet /></div>
      </div>
    </main>

    <footer class="footer mt-4 p-3 bg-white border-top">
      <div class="container">
        <span class="text-muted">This application is part of the Ability Getting Started
        tutorial series that can be found on
        the <a target="_blank" href="https://clientsuccess.ability.abb">
        Ability Developer Portal</a>.</span>
      </div>
    </footer>
  </div>
</template>

<script>
import AccessToken from './auth/AccessToken';
import TypeDefinition from './typeDefinitions/TypeDefinition';
import ObjectModelGet from './objectModels/ObjectModelGet';

export default {
  name: 'App',
  components: {
    AccessToken,
    TypeDefinition,
    ObjectModelGet
  }
}
</script>
We imported our new compnent, declared it in the components object and displayed in the HTML template.
The browser should be already displaying it:
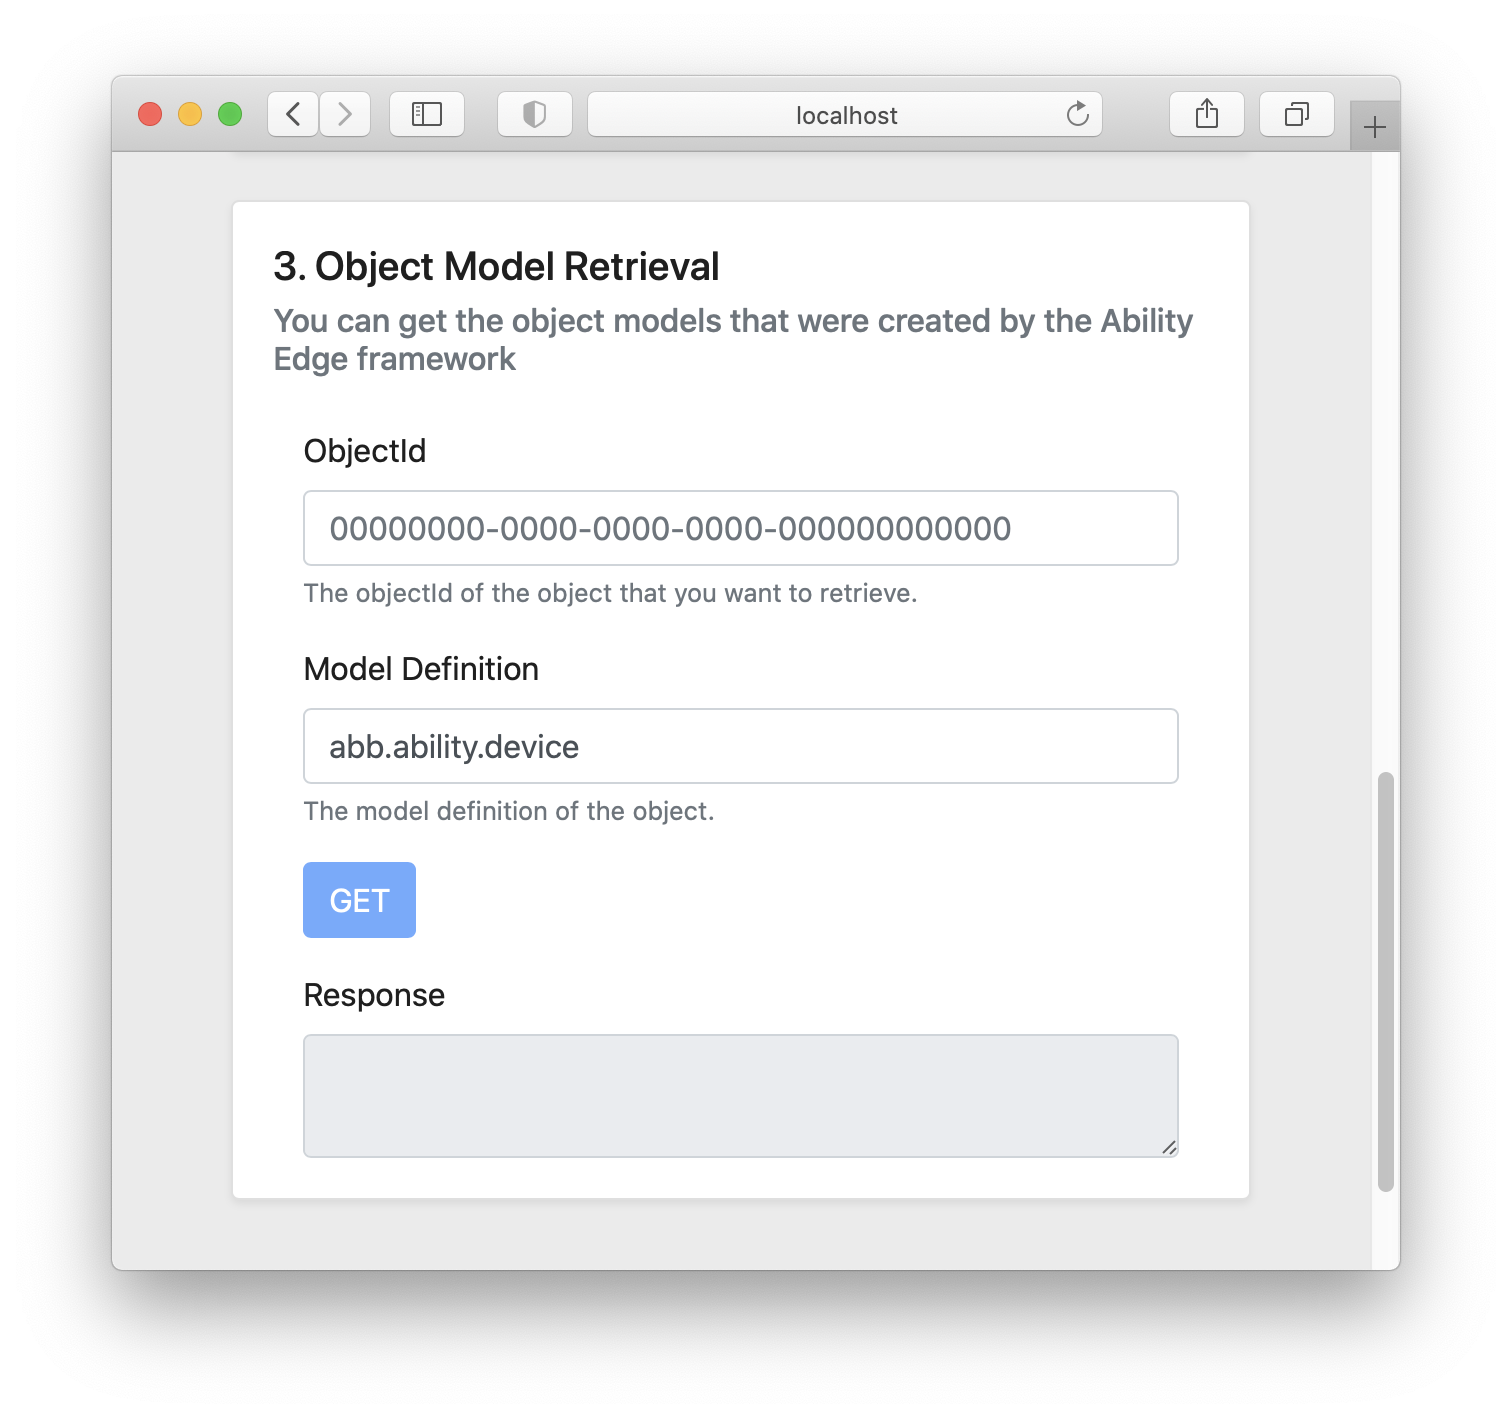
You can test it out by providing some objectId (i.e. the objectId of your module that can be found in the logs on the Edge) and corresponding model definition name (for module it could be either "abb.ability.device" or "abb.ability.configuration").
You are not going to see anything new to you - you have seen this models in the logs of your module already. However, you learnt about an important API endpoint of the platform!
TIP
Other than GETting the selected object model, API allows you also to create, update, patch (as we will see in a moment), delete, query, and others. You can see all available endpoints in API Playground.
# Patching Object Models
Let's move on to a more interested part of this article - patching object models. Our
module.configuration type has a property called telemetryInterval. The whole point of creating
abb.ability.configuration based type definitions is to provide a way of configuring your entities.
Our Edge module is subscribed to its configuration changes. Let's see if this functionality actually
works.
TIP
It wil be beneficial if you have your Edge still running. It would be best to display the logs of
your module in a "follow" mode. First list your services with docker service ls, make a note of
your module's service ID, and then invoke docker service logs -f <Id_of_your_module_service> with
the ID in place of the placeholder.
First, let's create another Vue.js component - src/objectModels/ObjectModelPatch:
<template>
  <div class="card" style="height: 100%">
    <div class="card-body">
      <h5 class="card-title">4. Object Model Patch</h5>
      <h6
        class="card-subtitle text-muted mb-4"
      >You can update your objects, i.e. the configuration of your Edge module</h6>
      <div class="container">
        <div class="row">
          <div class="col">
            <form @submit.prevent>
              <div class="form-group">
                <label for="objectIdInput2">ObjectId</label>
                <input
                  v-model="objectId"
                  type="text"
                  class="form-control"
                  id="objectIdInput2"
                  placeholder="00000000-0000-0000-0000-000000000000"
                />
                <small
                  class="form-text text-muted"
                >The objectId of the object that should be updated.</small>
              </div>

              <div class="form-group">
                <label for="modelDefinitionInput2">Model Definition</label>
                <input
                  v-model="modelDefinition"
                  type="text"
                  class="form-control"
                  id="modelDefinitionInput2"
                />
                <small class="form-text text-muted">The model definition of the object.</small>
              </div>

              <div class="form-group">
                <label for="objectUpdateTextArea">Object Model Update</label>
                <textarea
                  v-model="objectUpdateBody"
                  class="form-control"
                  id="objectUpdateTextArea"
                  rows="6"
                />
                <small class="form-text text-muted">The part of your object to be updated.</small>
              </div>

              <button
                type="button"
                @click="updateObject"
                class="btn btn-primary mb-3"
                :disabled="!modelDefinition || !objectId"
              >PATCH</button>

              <section
                class="alert"
                v-if="isSuccess !== null"
                v-bind:class="{ 'alert-success': isSuccess, 'alert-danger': isSuccess === false }"
              >{{ alertText }}</section>
            </form>
          </div>
        </div>
      </div>
    </div>
  </div>
</template>

<script>
import AuthService from "../auth/AuthService";
import { patchObjectModel } from "./objectModelService";

export default {
  name: "ObjectModelPatch",
  data: function () {
    return {
      authService: null,
      modelDefinition: "abb.ability.configuration",
      objectId: null,
      objectUpdateBody: null,
      isSuccess: null,
      alertText: null,
    };
  },
  methods: {
    async updateObject() {
      try {
        this.isSuccess = null
        this.alertText = null

        if (!this.authService.isAuthenticated()) {
          await this.authService.signIn();
        }
        const { accessToken } = await this.authService.getToken();

        const response = await patchObjectModel(
          accessToken,
          this.objectId,
          this.modelDefinition,
          this.objectUpdateBody
        );
        this.alertText = "Object updated.";
        this.isSuccess = true;
      } catch (error) {
        console.log(error);
        this.alertText =
          "There was some problem with your request. Check the console for details.";
        this.isSuccess = false;
      }
    },
  },
  created: function () {
    this.authService = AuthService.getInstance();
  },
};
</script>
The code is very similar to our previous component (ObjectModelGet). The only differences are a
different set of inputs (this time we used textarea, because PATCH endpoint requires a payload).
We also use the patchObjectModel function that we recently created in objectModelService.js.
As usually, let's make this component visible on the page by adding it into src/App.vue:
<template>
  <div class="app">
    <header class="mb-4">
      <nav class="navbar navbar-light bg-white border-bottom">
        <div class="container">
            <span class="navbar-brand mb-0 h1 text-wrap">
            Getting Started with <span class="abb font-weight-bold">ABB Ability™ Platform
            </span></span>
        </div>
      </nav>
    </header>

    <main class="container">
      <div class="row">
        <div class="col-12 mb-4"><AccessToken /></div>
        <div class="col-lg-6 mb-4"><TypeDefinition /></div>
        <div class="col-lg-6 mb-4"><ObjectModelGet /></div>
        <div class="col-lg-6 mb-4"><ObjectModelPatch /></div>
      </div>
    </main>

    <footer class="footer mt-4 p-3 bg-white border-top">
      <div class="container">
        <span class="text-muted">This application is part of the Ability Getting Started
        tutorial series that can be found on
        the <a target="_blank" href="https://clientsuccess.ability.abb">
        Ability Developer Portal</a>.</span>
      </div>
    </footer>
  </div>
</template>

<script>
import AccessToken from './auth/AccessToken';
import TypeDefinition from './typeDefinitions/TypeDefinition';
import ObjectModelGet from './objectModels/ObjectModelGet';
import ObjectModelPatch from './objectModels/ObjectModelPatch';

export default {
  name: 'App',
  components: {
    AccessToken,
    TypeDefinition,
    ObjectModelGet,
    ObjectModelPatch
  }
}
</script>
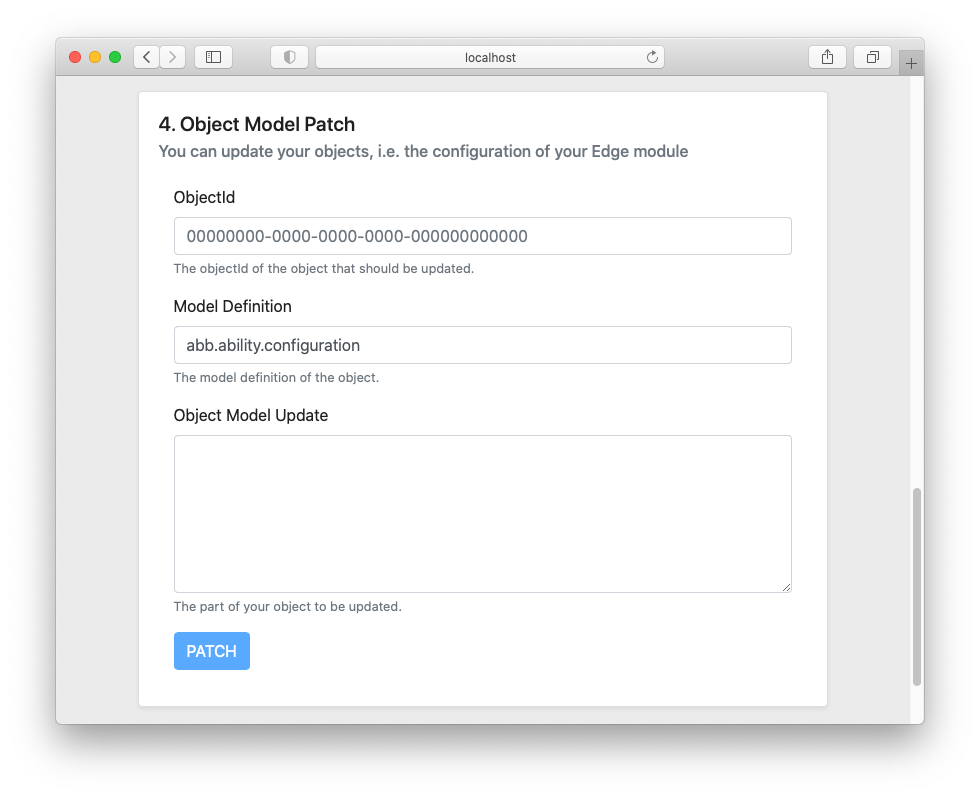
The result looks like that:
Let's try to use it. Firstly, let's use the previous component to get the abb.ability.configuration object of our module:
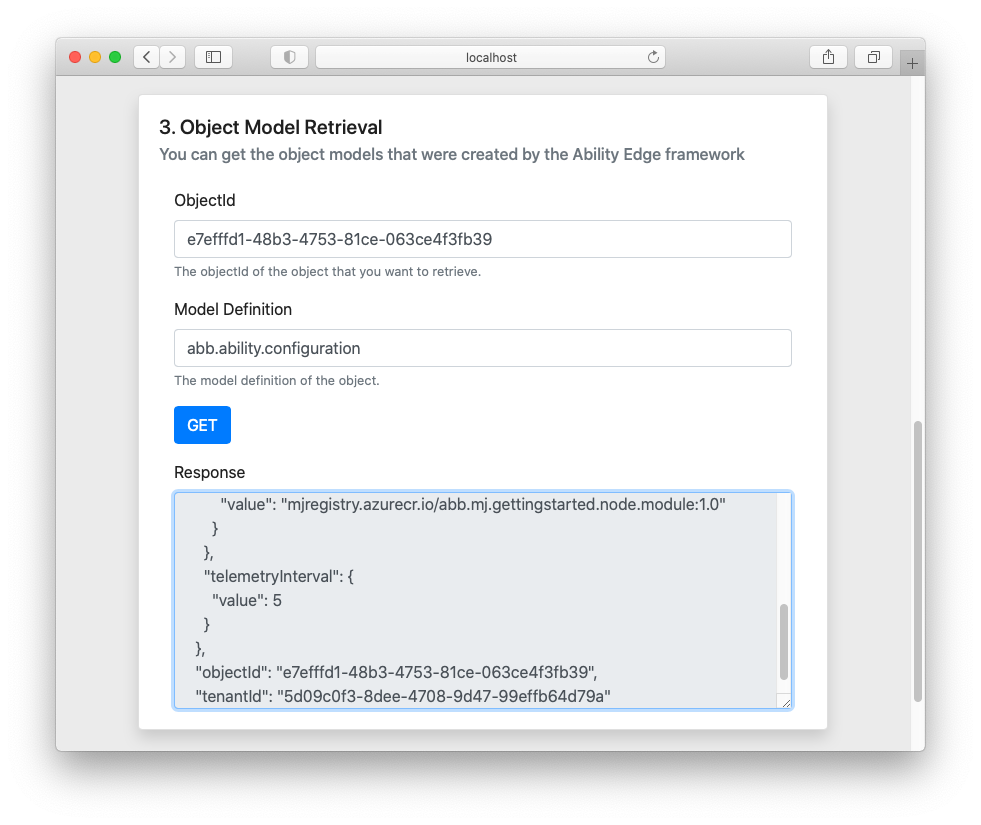
We will try to update the value of its telemetryInterval property. Currently it should be equal to 5.
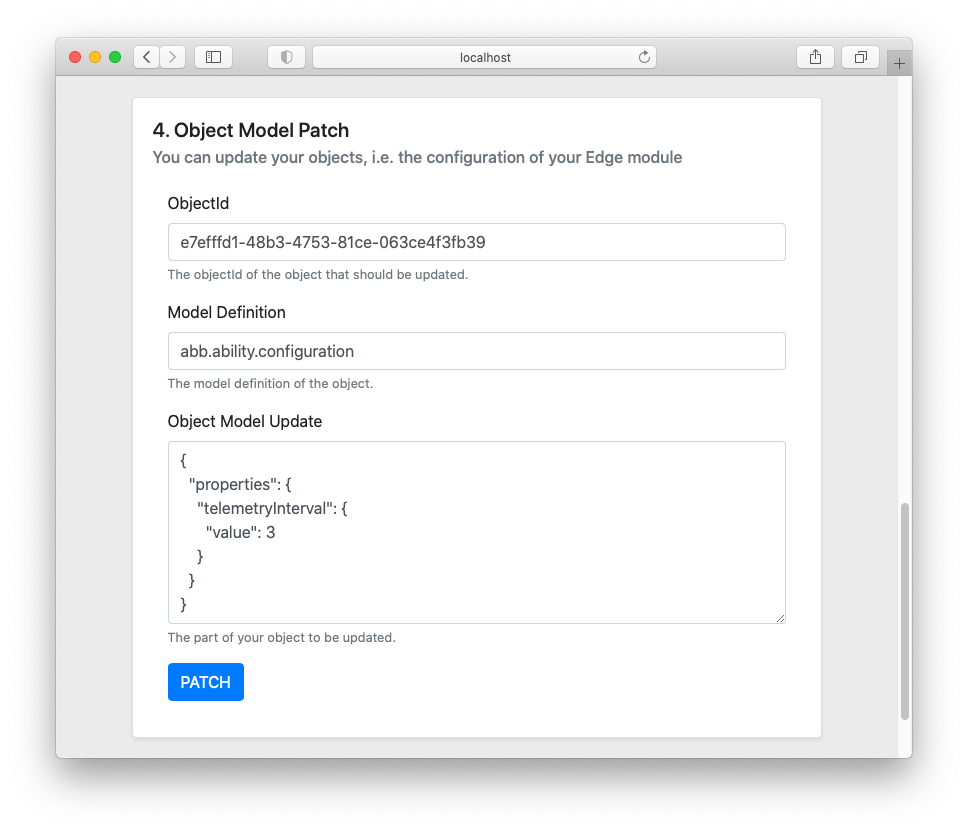
In order to update it, we will send the following payload in the PATCH:
{
  "properties": {
    "telemetryInterval": {
      "value": 3
    }
  }
}
The value can be any integer ("integer" data type has been specified in the type definition, so we have to follow that - other kind of value would result in an error being returned).
You also need to provide the objectId and model definition (abb.ability.configuration in this case) of your module.
TIP
There is also a PUT endpoint that has a similar functionality as the PATCH one. The difference is that in the PUT one, you have to provide the whole object that you are updating, not just the part that you're changing. It's recommended to use PATCH when possible, since the sent payload may be much smaller in some cases (you could have dozens of properties in your object).
If your Edge is still running, you will see a new log appear (according to the code of the module that we created):
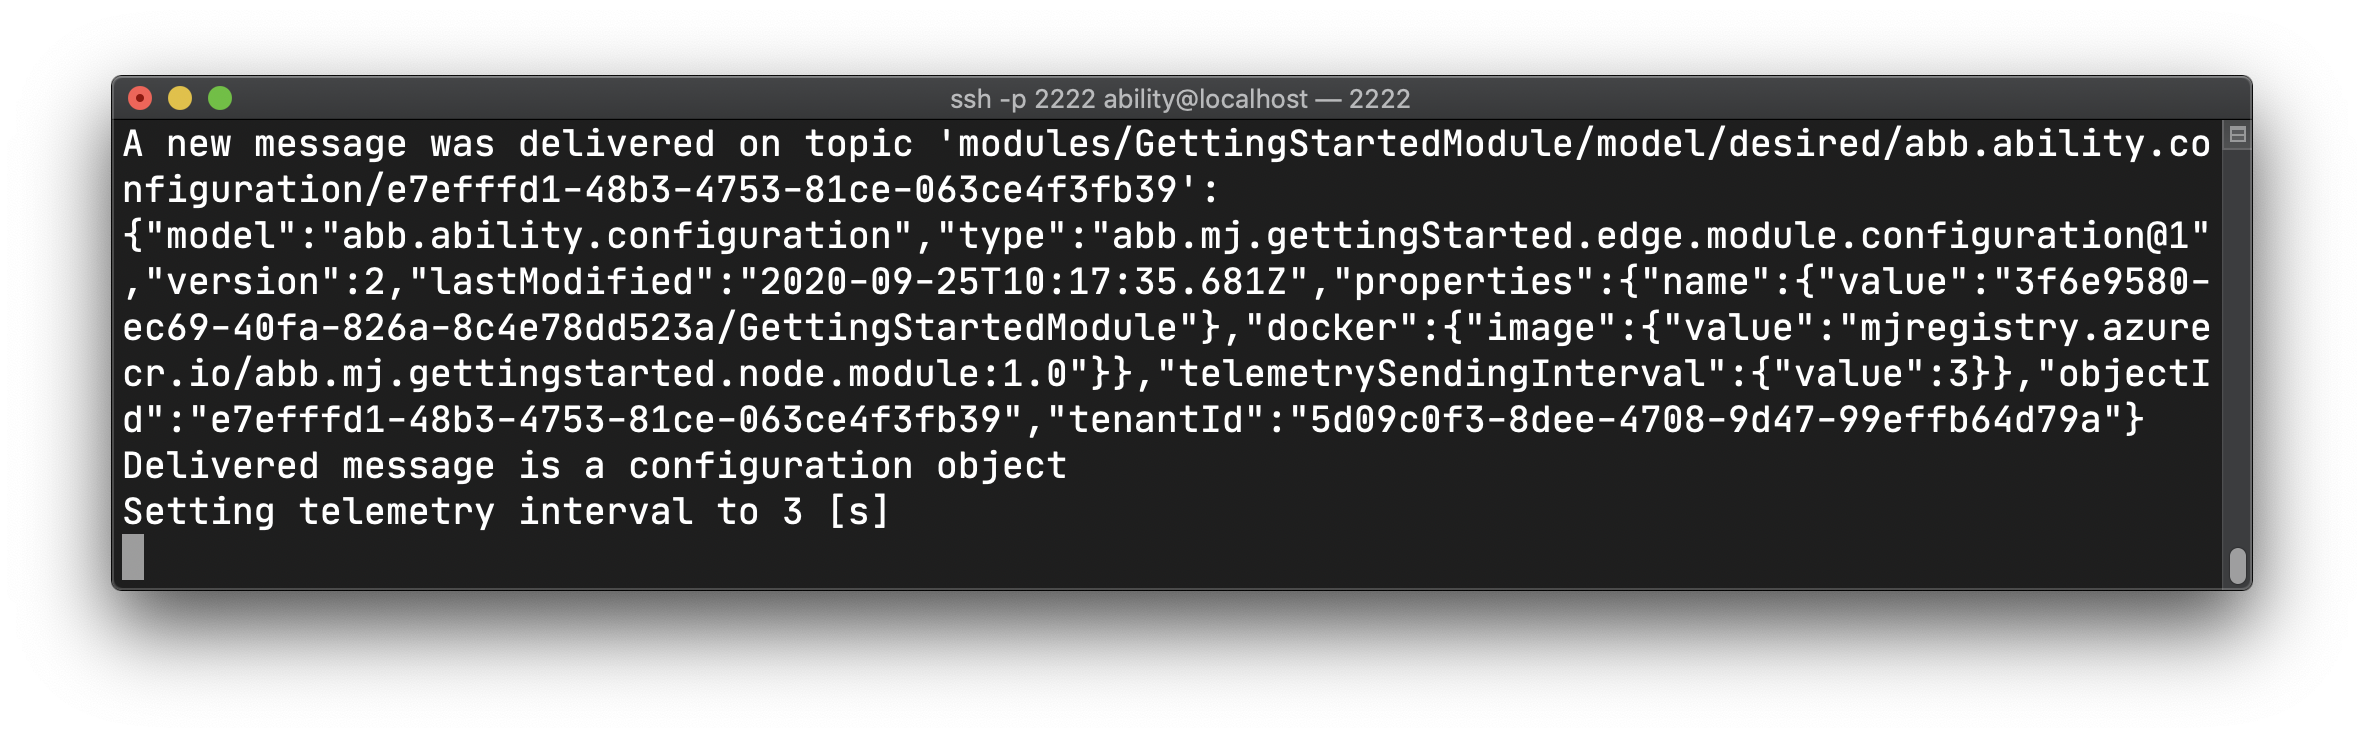
This way we achieved cloud-to-device communication.
WARNING
You just patched a value of telemetryInterval of our module's configuration. Note that we did it
only for this one instance of the module! The type definition still contains the original value (5).
If you decided to spin up a new Edge, another set of objects will be created for it and the
telemetryInterval will be equal to 5 there. If you wanted to change the value for every future
instance of your module that ever gets creates, you'd need to update the type definition of it with
the new value, and not just some single object.
# Summary
In this part of the tutorial we have finally "connected" our web application with the Edge, in a way that an action made in the web app causes a reaction on the Edge. Let's move further with that by enabling/disabling timeseries telemetry on the Edge via the web app.