# Extending and Running the Edge Module
We got to the point where our module has functionality allowing it to:
- listen for configuration updates
- create a child device
In this article we will:
- add telemetry sending functionality;
- add support for methods to
startTelemetryandstopTelemetry; - upload a Docker image of our module into a private container registry (that we will create)
- update the type definition of our module so that it uses the appropriate image
- run the Edge with our module
Local development
Until now, you could only look at the code of the module and trust that it will eventually work. Due to a tight dependency on MQTT message bus, it is not straightforward to just run the app and check how it works. You would have to mock the MQTT broker and possibly simulate some messages incoming to the module to really test it out. In this tutorial we will hope for the best and run it in the Edge environment directly.
Ability Edge VM
As it was mentioned in the prerequisites, you are going to need an Ability Edge virtual machine. If you haven't started to download the image yet, this is a good time to do that. The VM will be needed in this module of the tutorial. Grab the latest version of kind that suits your Virtual Machine software.
# Telemetry Sending Functionality
Let's get back to our code editor and index.js file. First of all, add a new global variable:
// Initial configuration
const eventEmitter = new EventEmitter()
const initialConfigEvent = "initialConfiguration";
let receivedInitialConfig = false

// Shared objects
let mqttClient = null
let envConfiguration = null

// Telemetry
let telemetryInterval = null
let deviceObjectId = null
let telemetryTimerId = null
It will store the id of the timer, which will be used to schedule telemetry message sending.
Let's add a new function that we will use to generate random telemetry messages:
function generateSomeTelemetry() {
    return {
        objectId: deviceObjectId,
        variable: process.env.DEVICE_VARIABLE_NAME,
        value: Math.floor(Math.random() * 100),
        timestamp: new Date().toISOString(),
        model: "abb.ability.device"
    }
}
This function returns a new object each time, which conforms to the required contract of telemetry payload. It should contain:
objectIdof the "producer" of the telemetry. In our case it is the temperature sensor.variable- the name of the variable that was defined in the type definition of our device. It is being read from the.envfile, where we already set it astemperature.value- the actual value that defines our data point. In this case we are generating it randomly. Expect the temperature to go crazy.timestamp- a ISO8061-formatted timestamp of the produced value,model- rememeber that any entity in Ability can have multiple objects associated with it? Each of these objects would be of different type definitions, and each type definition of a different model definition. In this field we are specifying the model definition that our type definition was defined upon. OurtelemetrySensor.deviceuses "abb.ability.device", so we just need to use that one.
Additionally, there is an optional field called quality, which allows you to specify the quality
of your value. The meaning of this quality would need to be interpreted by you in your applications.
Ability Platform does not interpret this value. In our example, let's leave it out.
Let's add another function:
async function publishTelemetry() {
    const telemetry = JSON.stringify(generateSomeTelemetry())
    console.log("Publishing telemetry: ", telemetry)
    await mqttClient.publish(`${envConfiguration.mqttMessagesOutTopic}/type=timeSeries`, telemetry)
}
This one will be used for sending the telemetry to the cloud via MQTT Broker and Proxy. It is quite
similar to what we've been doing in createChildDevice function. This time, however, we are
sending different payload and using a bit different topic. /type=timeSeries is appended this time
- Proxy will interpret it as a telemetry message.
# Method Invocation Handling
Edge Modules (or Ability devices in general) have an ability to support methods. Methods are some predefined actions that a device can do when commanded to do that. Some facts about this functionality
- methods that your device supports have to be defined in its type definition (look at
module.device) - methods are invoked via Instance API
- methods can accept some input and they can return output (we will not use that here)
- method invocations come to the Edge module as a message on a specific topic
Let's add support for methods to our module. We will need to support startTelemetry and
stopTelemetry, since these two methods were defined in the type definition.
First, let's add the last global variable in our code (just below the last one we added -
telemetryTimerId):
let isTelemetryStarted = false
This flag will be used by us to easily determine whether the telemetry was already started or not,
when a startTelemetry or stopTelemetry comes in. We don't want to start/stop telemetry sending
twice in a row.
Then, let's extend our receivedMessage callback function:
async function receivedMessage(topic, message) {
    console.log(`A new message was delivered on topic '${topic}':`)
    const messageJson = message.toString('utf8')
    console.log(messageJson)

    if (topic.includes(envConfiguration.mqttModelInTopic)) {
        handleModelMessage(topic, JSON.parse(messageJson));
    } else if (topic.includes(envConfiguration.mqttMethodsInTopic)) {
        await handleMethodMessage(topic);
    }
}
This time, instead of trusting that every incoming messgae is a model update, we will differentiate
between model updates and method invocations. Let's add handleMethodMessage function:
async function handleMethodMessage(topic) {

    const requestId = topic.split("/").pop()

    if (topic.includes("startTelemetry")) {
        console.log("Telemetry START")
        if (isTelemetryStarted) {
            console.log("Telemetry is already started. Ignoring the request.")
        } else {
            isTelemetryStarted = true
            setupTelemetryTimer()
        }

    } else if (topic.includes("stopTelemetry")) {
        console.log("Telemetry STOP")
        if (!isTelemetryStarted) {
            console.log("Telemetry is already stopped. Ignoring the request.")
        } else {
            isTelemetryStarted = false;
            clearTimeout(telemetryTimerId)
        }
    }

    const confirmationTopic = `${envConfiguration.mqttMethodsOutTopic}/200/${requestId}`
    await mqttClient.publish(confirmationTopic, "{}");
}
In this function we are handling both the startTelemetry and stopTelemetry. We are reading
requestId in the beginning, because it is needed for sending back of confirmation that we handled
the method successfully (HTTP 200 code). In a production code we would definitely also handle errors
if they'd appear in the process.
One last function that we need to add is setupTelemetryTimer:
function setupTelemetryTimer() {
    telemetryTimerId = setTimeout(async () => {
        await publishTelemetry()
        setupTelemetryTimer()
    }, telemetryInterval * 1000)
}
We're using a standard setTimeout recursively here so that we get an infinite "loop" of telemetry
sending (until stopTelemetry is called that uses clearTimer). We didn't use setInterval here,
becasue we also wanted to be able to change telemetryInterval via configuration updates while
telemetry is being started.
The codebase of our module is finished. Before we will be able to run it on an Edge, we need to dockerize it. Let's go!
# Containerization
Ability Edge framework requires all of the modules to run as Docker containers. Turning our app into a dockerized app is pretty straightforward. However, before we do that, we need to have some container registry that the Edge will be able to fetch our app's image from.
# Container Registry
The system modules of Ability Edge (Proxy. MQTT Broker) are stored in the container registry maintained by the Ability Edge team. It is recommended to use a different registry for storage of custom modules images. Let's then create our own registry. One option to do that is to create an instance of Azure Container Registry. In this guide, we will do that. if you prefer to use some other way, feel free to do that.
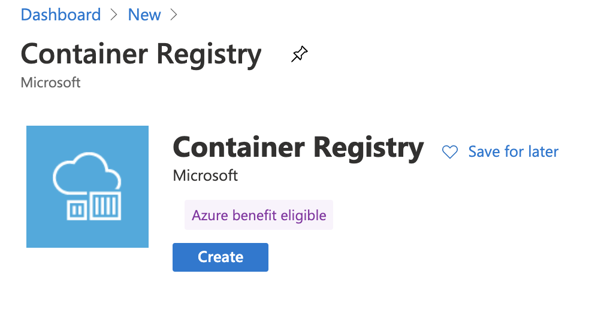
Login to Azure Portal and create a new resource of type "Container Registry".
Name your registry anyway you like. You can go with the "Basic" tier for the needs of this guide. Wait for your resource to be created. When it's done, go to its details and open the "Access keys" menu.
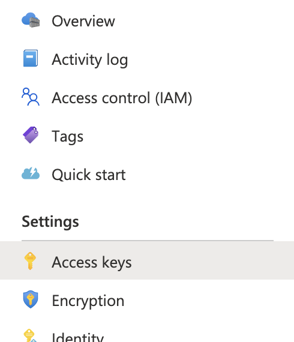
Enable the "Admin user" option to be able to simply use the login/password to access your registry without the need of installing Azure CLI. The username and password will be displayed.
TIP
The "Premium" tier of ACR will allow you to use Tokens feature, which would probably be a better way to go than a "global" admin login/password pair.
Launch a terminal and login to your newly-creater container registry:
docker login <your_registry_name>.azurecr.io
Provide your username and password. Let's now actually create the image that we will "push" into the registry.
# Docker Image
First, create a Dockerfile file with the following contents:
FROM node:14-alpine
WORKDIR /usr/src/app
COPY package*.json ./
RUN npm install
COPY . .
CMD [ "node", "index.js" ]
We're using node:14-alpine as a base image, because it is lightweight and enough for our purposes.
During the image creation, we will install the dependencies and run index.js, which is the
starting point of our app.
Additionally, to keep some unneeded files out of the image, let's add a .dockerignore:
node_modules
We don't need to copy node_modules. It will be generated for us when npm install is run.
Now, the last thing to do is to build the image and push into our Container
Registry. Launch a terminal, navigate (with cd) to the directory where your
code is, and then run:
Don't overlook the dot!
Note that the command below has a dot (".") at the end. It points the command to the directory where the dockerfile should be read from. Dot represents the current directory.
docker build -t <your_registry_name>.azurecr.io/<name-of-your-module>:1.0 .
In the example above, there are two placeholders for you to fill in. The registry is a private one of yours, so you can name your image any way you like. We called ours "ability-getting-started-module".
When the image gets built, run the following to push it to the registry:
docker push <your_registry_name>.azurecr.io/<name-of-your-module>:1.0
That's all. Your image is in the cloud. There is one more thing we have to do before we run it.
# Update Edge's Type Definition
Let's get back to our type definitions for a moment. We have them already uploaded in the cloud.
However, let's have a look at the module.configuration one once more, since it needs a small
update. In the properties.docker.image section we currently have:
...
"image": {
    "description": "Docker image of this module",
    "dataType": "string",
    "value": "abbability.azurecr.io/abb.mj.gettingstarted.node.module:1.0",
    "isMandatory": true
},
...
The module's configuration contains an information about the image source. Currently it points to an image that was created by CST. Most probably you would like to use the image that you have just created instead. That's why we need to update our type definition!
This time, instead of creating a special SPA module for that, let's just use curl.
TIP
You can use any HTTP client that you like (i.e. Postman). The provided curl example will show you what URL, headers, adn payload needs to be provided.
To invoke any Ability API, we need an access token. Let's generate one using our SPA (refer to the
first tutorial regarding our SPA to learn how to do that). If you recall from one of
the previous tutorials, one of the permissions that we selected for our app was
type_definition_write. We are making use of that permission now. Here's the command we need to
use:
curl --location --request POST '<base_url_of_instance_api>/v1/modelDefinitions/abb.ability.configuration/types' \
--header 'Content-Type: application/json' \
--header 'Authorization: Bearer <your_generated_access_token>' \
--data-raw '{
    "model": "abb.ability.configuration",
    "typeId": "<your_typeId>",
    "version": "1.1.0",
    "description": "Configuration of the Edge module",
    "unique": [
        "name"
    ],
    "properties": {
        "name": {
            "value": "GettingStartedModule",
            "description": "Name of this module (in the context of the edge device)",
            "dataType": "string",
            "isMandatory": true
        },
        "docker": {
            "env": {
                "dataType": "map",
                "values": "string"
            },
            "replicas": {
                "description": "How many replicas of this module should be created",
                "dataType": "integer",
                "minimum": 1
            },
            "image": {
                "description": "Docker image of this module",
                "dataType": "string",
                "value": "<your_image_uri>",
                "isMandatory": true
            }
        },
        "telemetryInterval": {
            "dataType": "integer",
            "description": "Interval between data points being sent (in seconds)",
            "value": 5
        }
    },
    "attributes": {
        "minimum": {
            "dataType": "integer",
            "appliesTo": [
                "integer"
            ]
        }
    }
}'
First of all, make sure that the following (highlighted) values are correctly replaced:
<base_url_of_instance_api>- input the base URL of the Instance API of your platform<your_generated_access_token>- an access token generated from the SPA<your_typeId>- the name of your existing type definition (i.e.module.configurationin my case)<your_image_uri>- full path to your image in the container registry
Notice that in the payload the version is now 1.1.0. Previously, it was
1.0.0. Every change requires a version bump. In this case, we are changing the
"minor" portion of the version string, because or change requires at least minor
change bump. If you tried to update just the "patch" portion of the version
(i.e. 1.0.1), you would get a descriptive error telling you that your change
is not a "patch" change (you can try that).
Run the command and make sure that you get a successful response.
To verify that your type was updated, you can run the following GET request:
curl --location \
--header 'Authorization: Bearer <your_generated_access_token>' \
--request GET '<base_url_of_instance_api>/v1/modelDefinitions/abb.ability.configuration/types/<your_typeId>'
Remember to replace <base_url_of_instance_api> and <your_typeId>
placeholders with the correct values. By the way, the type_definition_read
permission that you selected for your role (in the Admin Portal, remember?)
comes in handy now. Without it, you'd get a permission error.
# Ability Edge VM
Time to run the Edge. Hopefully, you've downloaded the Ability Edge VM by now and you are ready to continue. If so, follow this guide (or this one if you are using Hyper-V) to import the VM into your VM hypervisor.
Our documentation already contains a guide of how to configure Ability Edge SDK VM here. Please follow it with a few comments below:
- in the
dpcm.configfile modify the following values:PKI_RA_SERVER_ADDRESS- use the "Development" profile's SCEP Service Url from herePKI_CA_AUTH_HASH- use the "Development" profile's Issuing CA Fingerprint value from herePKI_ENROLL_PASWD- use the "Development" profile's Enrollment Code value from herePKI_CERTIFICATE_OU- use your BA (MO/RA/EL/IA)PKI_CERTIFICATE_O- use "ABB"ID_Service- use the Global ID Generator URL of your platform instance
- in the
edge.envfile modify the following values:DEVICE_ID- generate some GUID, using any tool (i.e. this online tool) and put it here. Make sure that the characters in the GUID are lowercase.DPS_ID_SCOPE- use the DPS Scope ID of your platform instance.EDGE_TYPE- put in the name of your edge's type definition (corresponding toedge.devicethat was presented in this tutorial series). Add the@1to it (a major version of your type definition). In example, the full value would bemj.edge.device@1.EDGEPROXYIMAGE- use the same version as you had in youredge.configurationtype definition. This is the initial version of the Proxy module that will be started. If your edge's configuration has a different version, Proxy will be switched to that as soon as the configuration is delivered to the Edge.IMAGEREGISTRIES- modify the configuration here so that your private container registry is added. Leave the defaultabbsetting unchanged. An example of it could look like this (the shown credentials will not work):
IMAGEREGISTRIES={"abb":{"serveraddress":"https://abbability.azurecr.io","username":"15439bb4-e82b-4f46-bbc1-810d51b3b8c0","password":"3ZWyeikV1fGaR3W/ht+163Q+tUIVylc12Mx7L3nWTrg="},"mj":{"serveraddress":"https://mjregistry.azurecr.io","username":"mjregistry","password":"jfB5HCXVu+yrV3543/QaAcuKyY0G1R"}}
In the example above, I added a container registry "mj" (this name does not really matter, you can
use anything). I input the values that I took from the Azure Portal (serveraddress, username,
password). Proxy module will use these values to log into your repository to fetch your Docker
image.
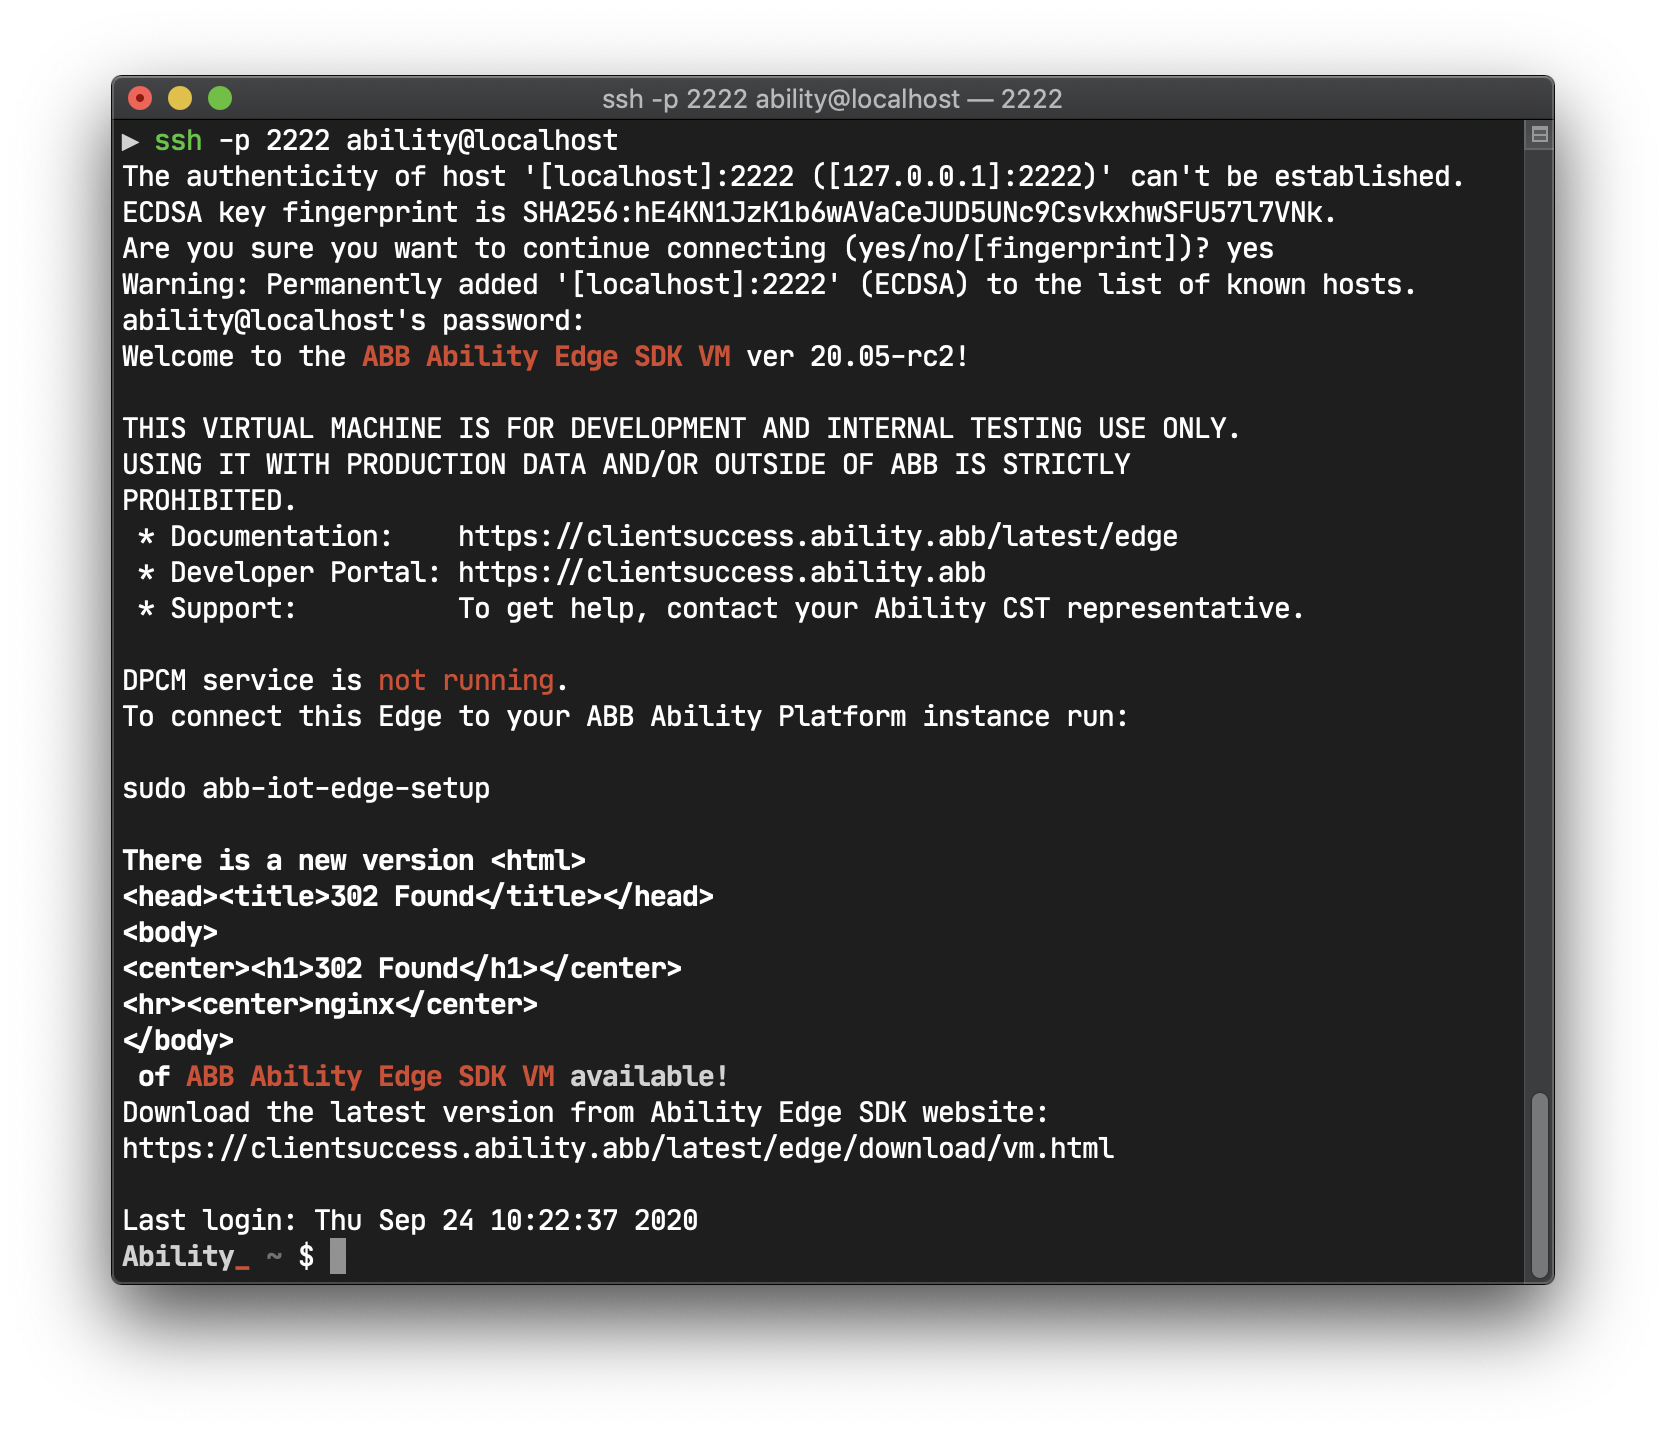
After modifying these two files, you should be ready to run the setup procedure, just like the
linked guide instructs you to do (sudo abb-iot-edge-setup). When it finishes, you will be
presented with a GUID identity of your edge:
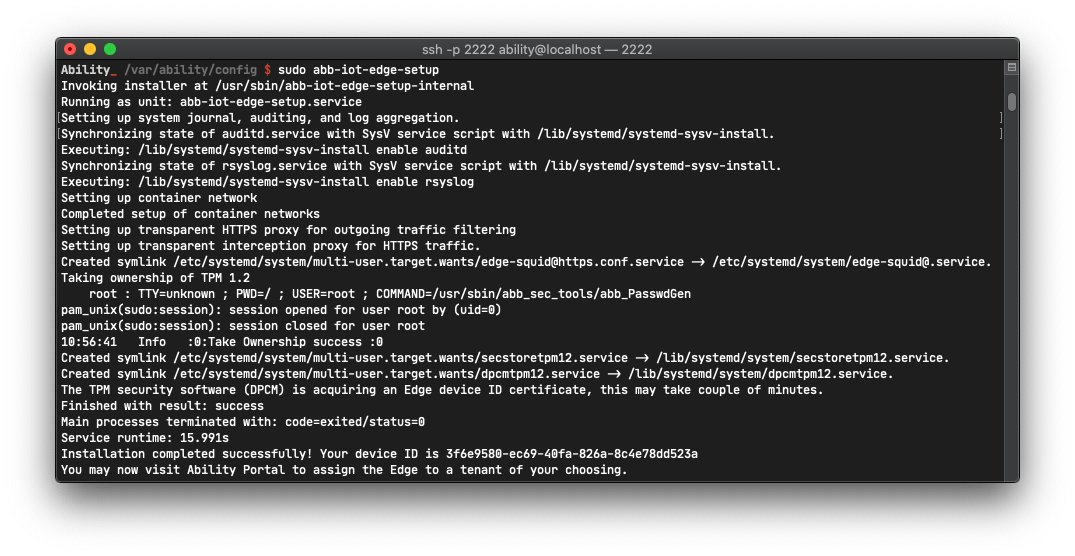
The setup process is now waiting for you to confirm that the device of a show identity is registered in the Admin Portal. Let's make that happen.
Log into the Admin Portal and navigate to your solution (the same one where you have previously created the application, grants, etc.). From there, go to the Devices tab. Create a new device:
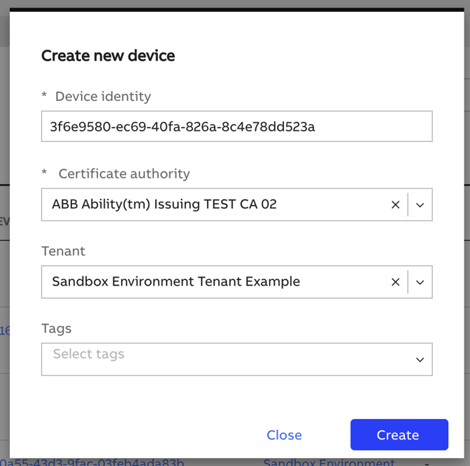
Use the GUID that was shown to you by the Edge Setup process as a Device Identity. Use the "ABB Ability(tm) Issuing TEST CA 02" as the Certificate authority. Select your tenant from the list.
After that, continue setting up the Edge by running:
sudo systemctl enable --now abb-iot-edge
After some period of time (mostly dependent on the speed of your internet connection) the Edge
modules should be running. Inspect that by invoking docker service ls. If you get something like
the following:

you are on the successful path.
You can monitor the logs of your module by executing:
docker service logs -f <ID_of_your_module_service>
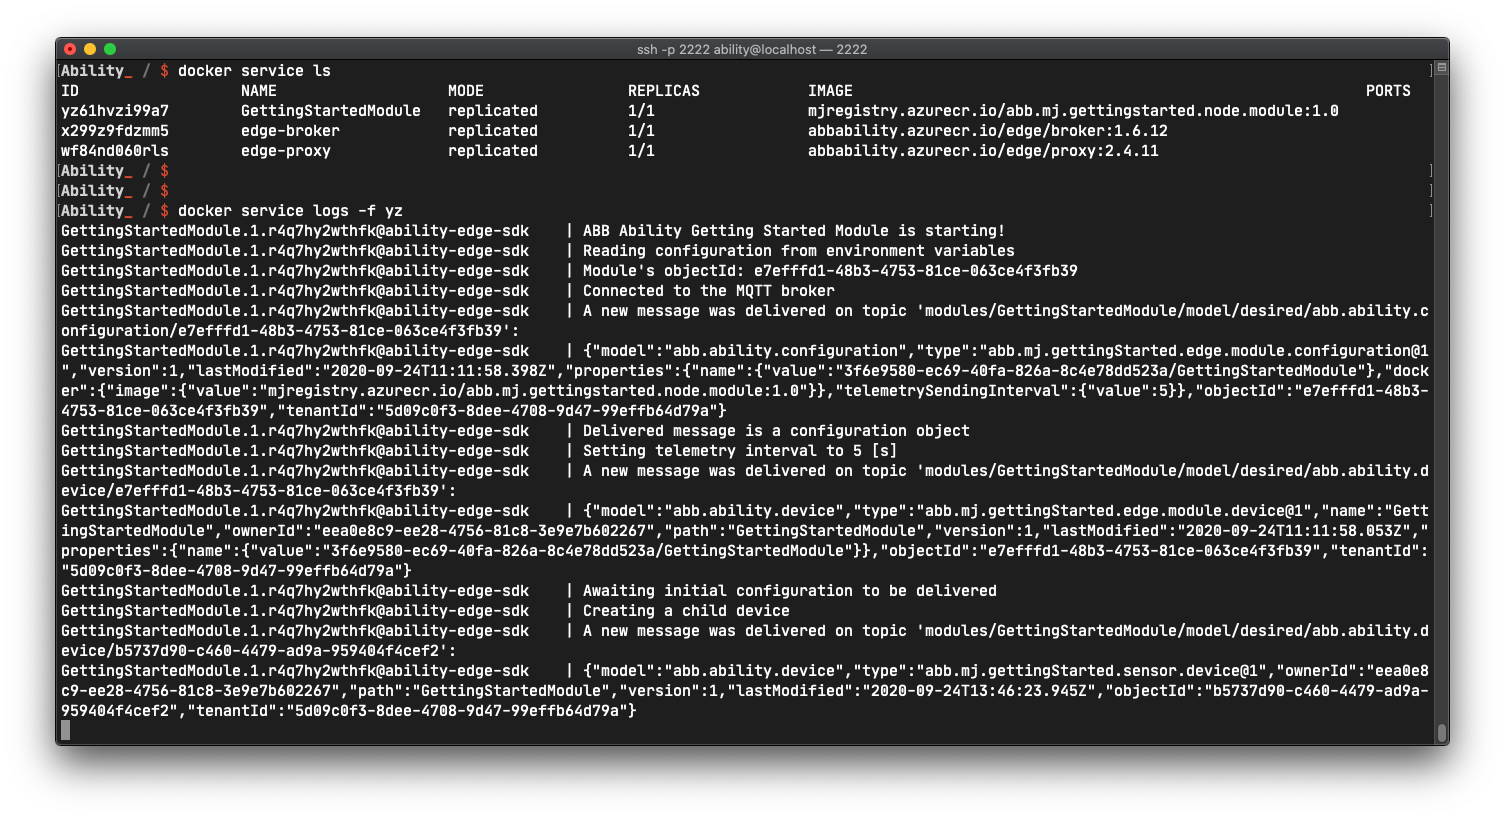
The logs should be showing you the following flow of actions:
- the module got started
- the module's objects get delivered and displayed
- configuration model gets read adn
telemetryIntervalis extracted from it - a child device creation request is sent
- child's object model is sent to the module, which means that the temperature sensor was successfully created
# Summary
In this part of the tutorial we finally run the device, which was a major part of our project. Hopefully you got to the same result as we presented in this article. This is definitely the most error-prone part of the series. In case of problems, don't hesitate to contact Ability Client Success Team. We're glad to help.
In the following articles we will get back to our web application and we will try to interact with our device by extending the app with new functionalities. See you there!